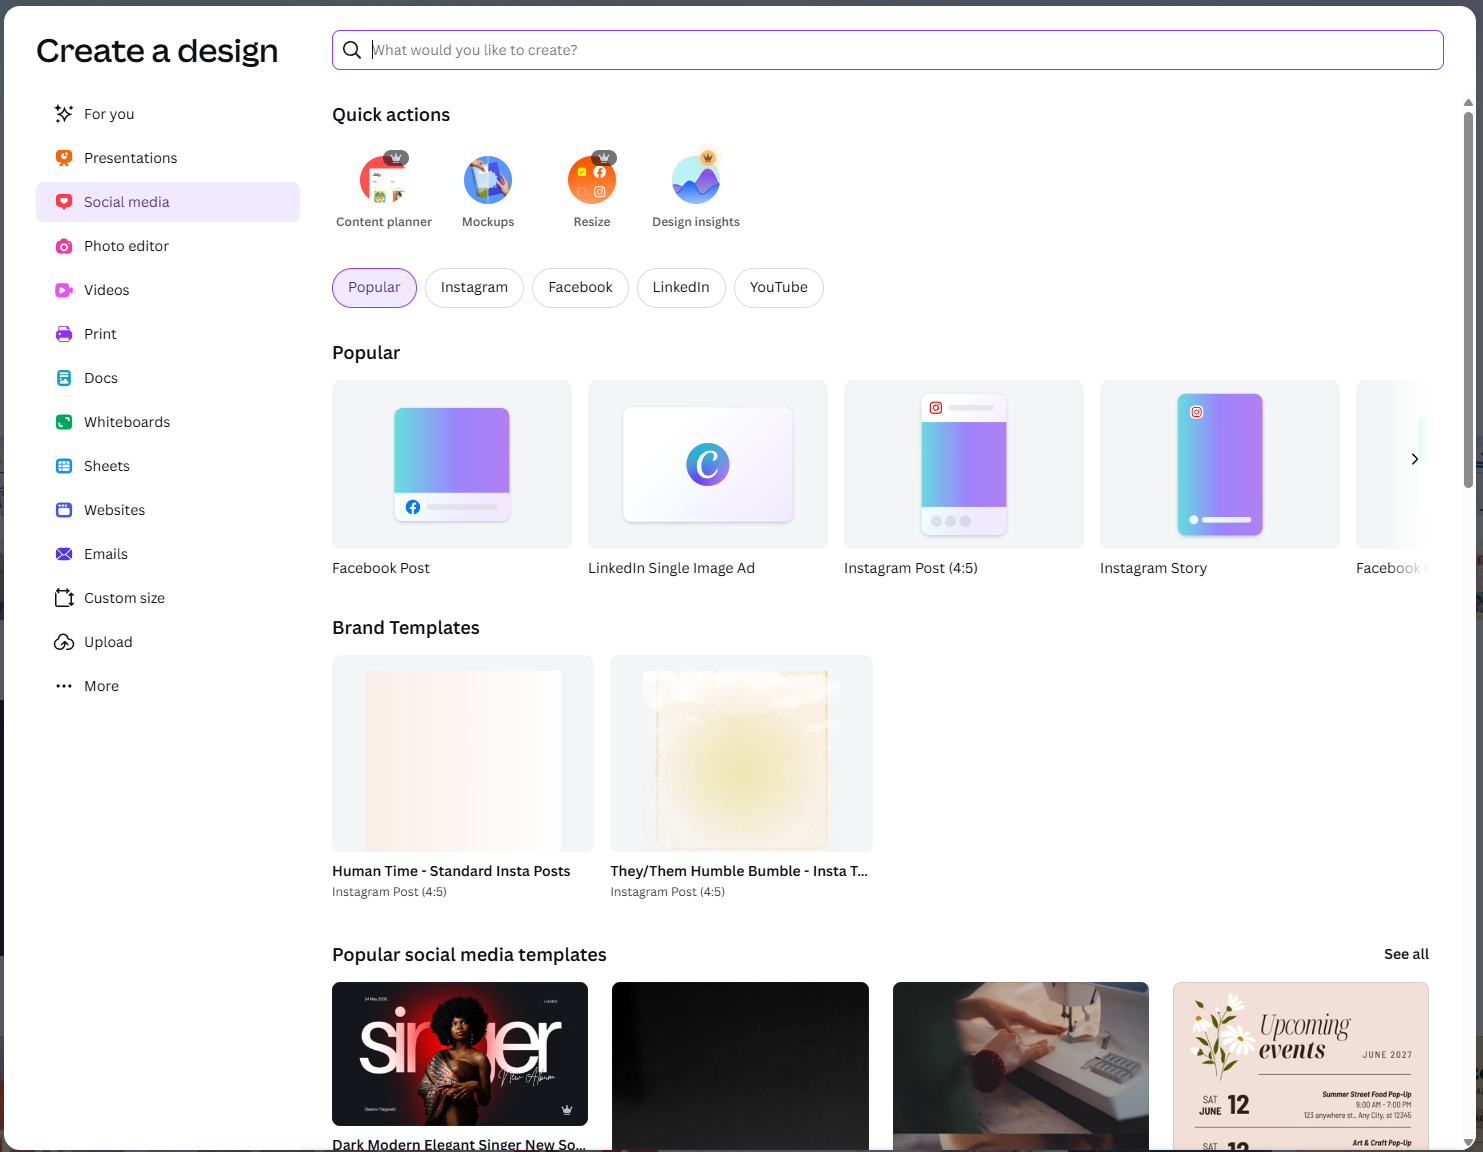
Select the type of document you want to create.
Have a look through them and have a play, there is no better way to learn!
Popular document/design sizes - Often what you might be looking for will be in here.
Design type categories
Search bar for document sizes - type what you want to make in here. Ie Flyer
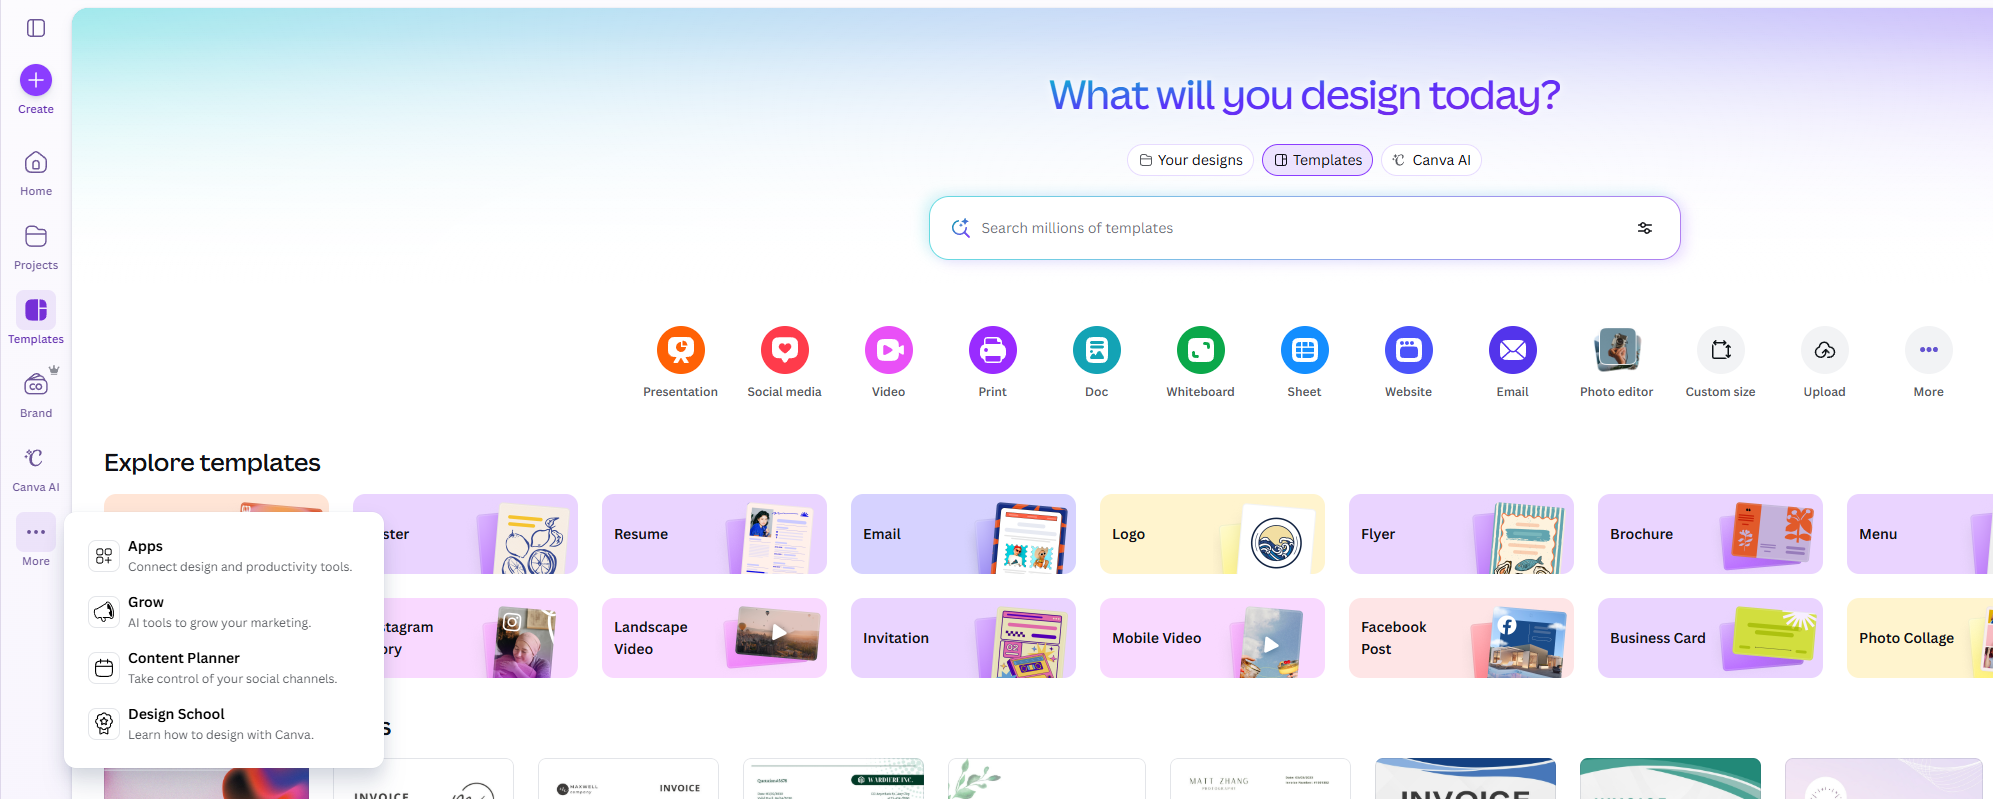
Create a new document/design
Takes you to home page with recent designs
Open project page - here you can create folders to keep designs in.
Browse available templates - also the first page that loads on entering Canva when logged in.
A place to manage your brand. Logo, Colours, Typography, Images etc. Pro Feature.
Canva AI generates design ideas, text, and images automatically to help you create content faster.
Apps you can use to extend the abilities of Canva - worth a look!
The Grow feature helps turn a simple design into a larger project,
expanding a post into slides, documents, or additional pages automatically.
Content planner allows you to connect your Social Media accounts and post automatically.
Design School is what it sounds like. Tutorials and courses to upskill at home!
This row of buttons allows for a quicker way to Create/Start specific types of documents
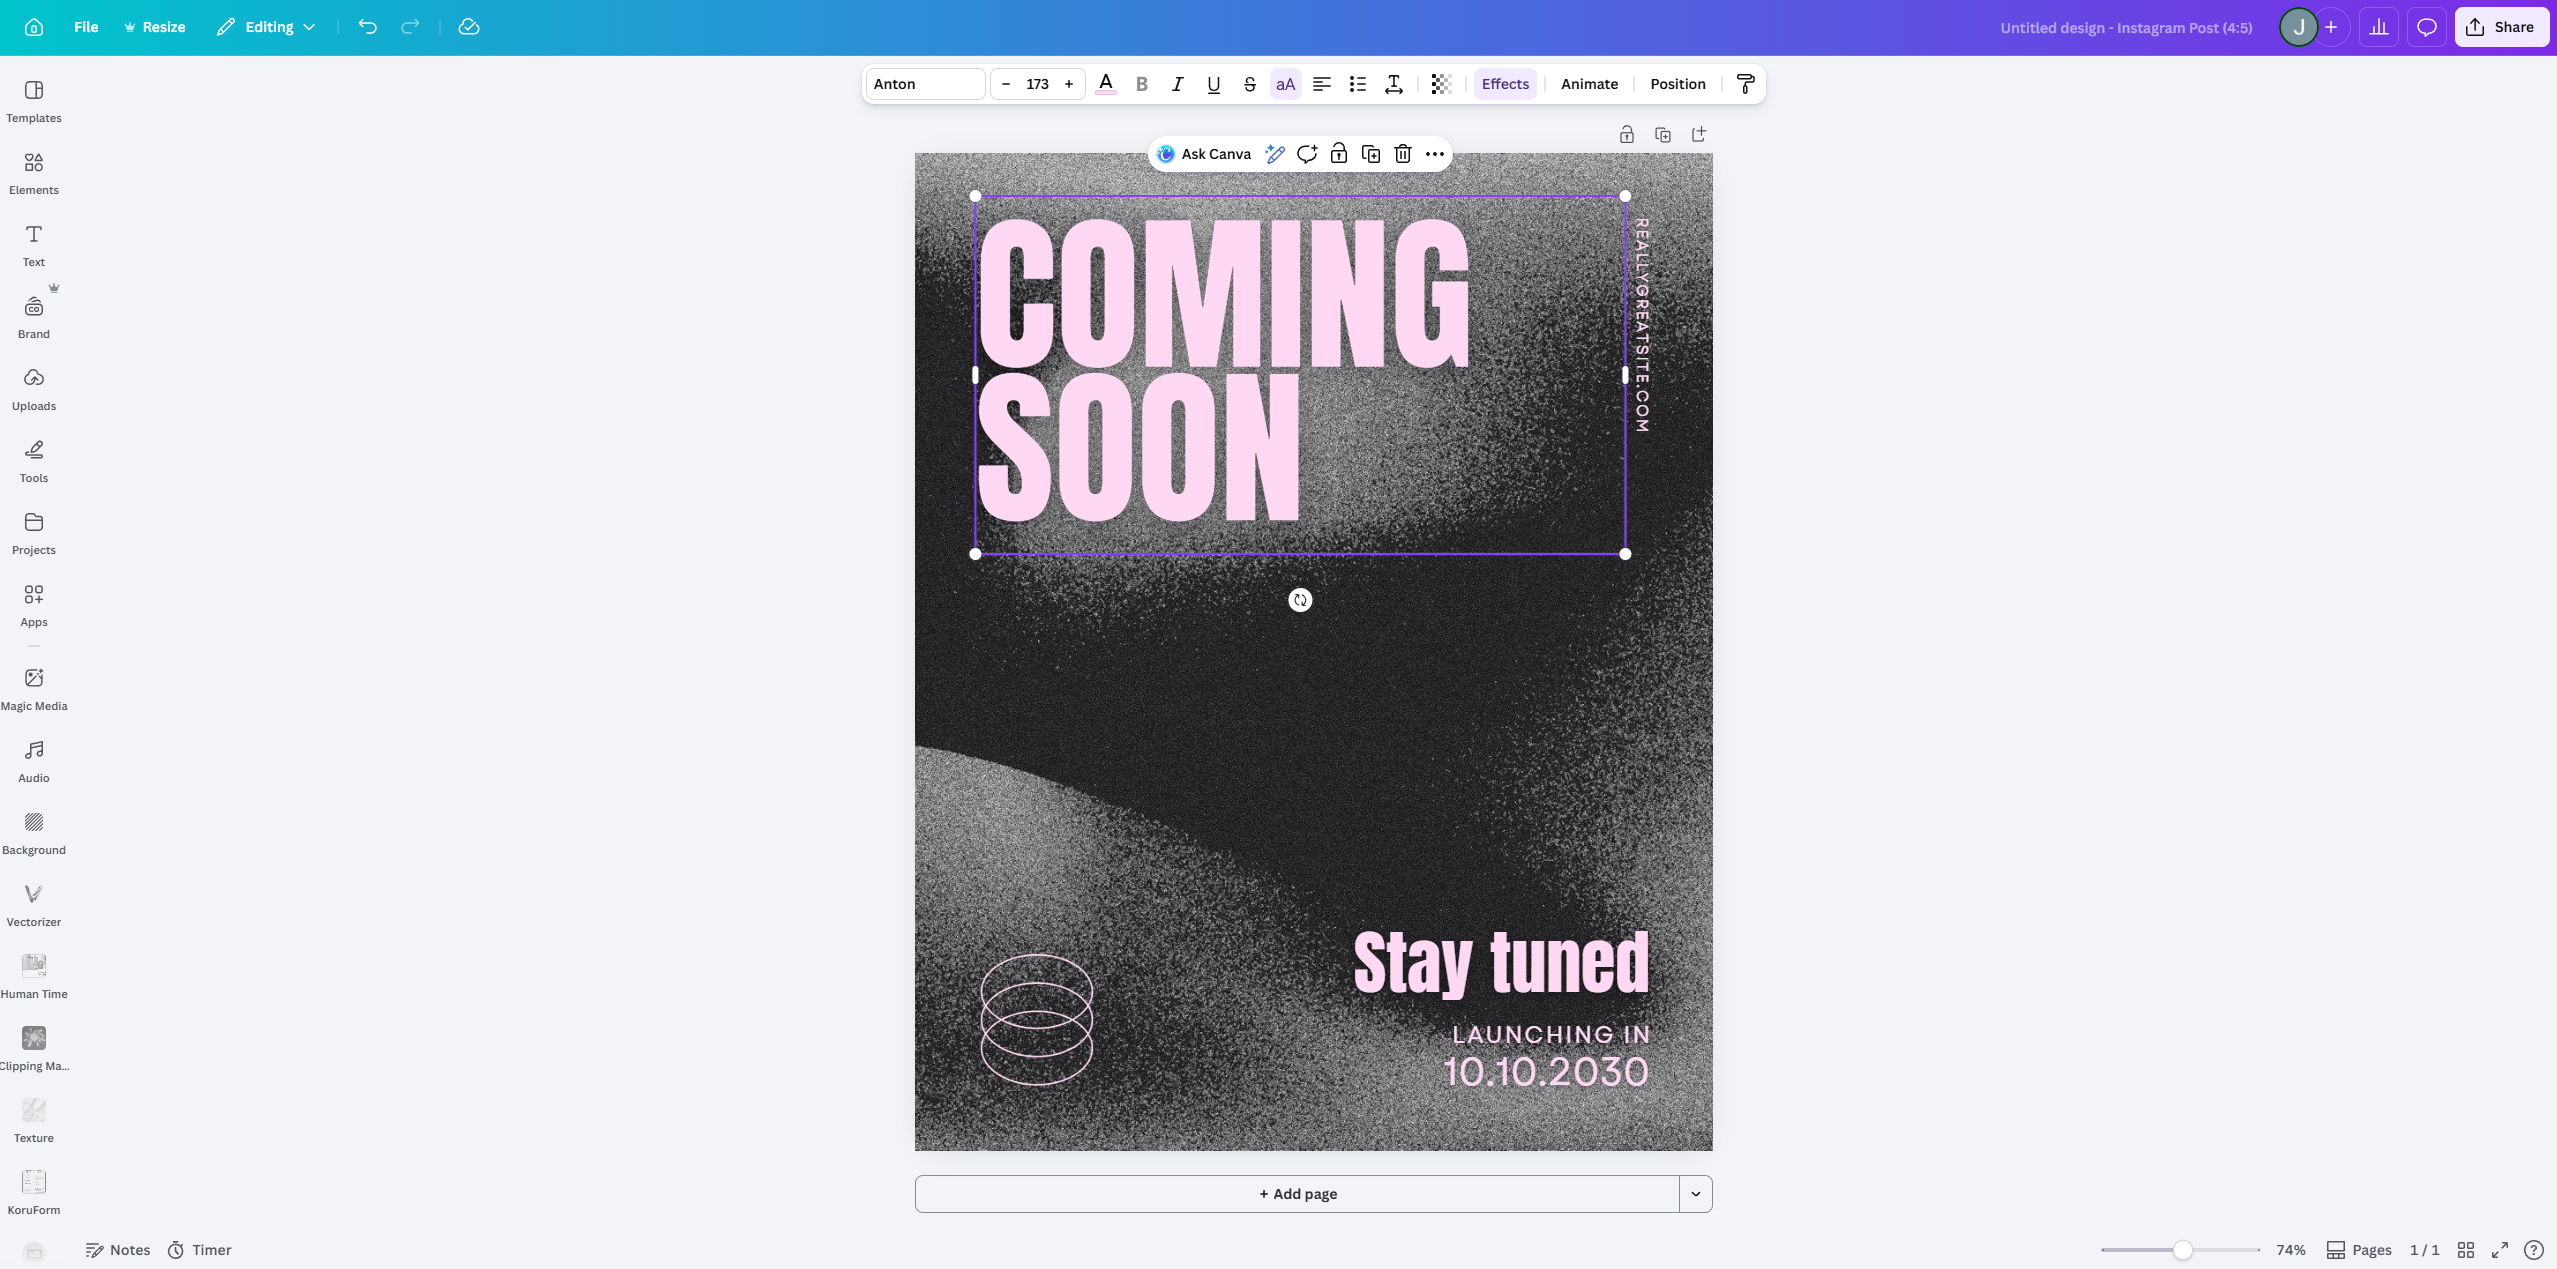
SideBar: Browse pre-designed layouts you can apply to your design
Returns to the home Template page
File Menu containing various page
settings and actions. Expanded breakdown below.
Resize your document - Canva Pro feature
Current mode - Editing, Commenting, Viewing
Undo button - Undo last action - can click multiple times
Redo button - Redo last undone action - can also be clicked multiple times.
Changes saved indicator and action history
Document Name
Share button - one way to share and download your document. Expanded breakdown shown below.
SideBar: Add shapes, icons, photos, illustrations, charts, and other design elements to your page.
SideBar: Insert headings, subheadings, and body text, or choose from styled text combinations.
SideBar: Access your brand kit including logos, colours, and fonts to keep designs consistent. Canva Pro Feature
SideBar: Upload your own photos, videos, and files to use directly in your designs.
SideBar: Access additional Canva tools such as drawing, QR codes, charts, and other specialised features.
SideBar: View and access your saved designs, folders, and recent projects.
SideBar: Connect external apps and tools to Canva to expand what you can create.
SideBar: Use AI to generate images, graphics, and videos from a simple text prompt.
SideBar: Add music or sound effects to your design or video project.
SideBar: Browse textures, colours, and images to use as the background of your design.
Apps & Recent documents folders displayed here. Will change for you,
depending on your apps and what you have opened.
Tool Bar. This bar is contextual. Will change when editing
image/text/shape etc. See below for examples of each type.
Ask Canva Bar - See below for breakdown

Use Canva’s AI assistant to help edit, generate,
or improve your design using simple prompts.
Open Canva’s image editing tools to adjust colours,
apply filters, or enhance your image.
Automatically replace or transform the background of an image using AI.
Canva Pro Feature
Remove the background from an image to isolate the subject.
Canva Pro Feature
Manually erase parts of an image or background
removal to refine the result.
Change or adjust the colour of the selected element.
Trim or resize the visible area of the
selected image or element.
Flip the selected element
horizontally or vertically.
Adjust how transparent or opaque
the selected element appears.
Copy the styling of one element and apply it to another.
Add a comment to the design to leave feedback,
ask questions, or collaborate with others.
Remove the selected element from your design.
Add animation effects to bring movement
to the selected element.
Arrange the element on the page by aligning,
layering, or spacing it with other objects.

Choose the typeface used for the selected text.
Adjust the size of the selected text.
Change the colour of the selected text.
Make the selected text thicker and more prominent.
Add a strike through to the selected text
Add a line beneath the selected text.
Add a strike through the selected text.
Change the capitalisation of the selected text
(uppercase, lowercase, etc.).
Align the text left, centre, or right within the text box.
Create bulleted or numbered lists from your text.
Adjust the space between lines of text and between letters.
Adjust how transparent or opaque the selected element appears.
Apply visual styles such as shadow, outline, curve, or lift to your text.
Add animation effects to make the text move or appear dynamically.
Control how the text is layered and aligned with other elements on the page.
Copy the styling of this text and apply it to another element.

Open editing options for the selected shape or graphic element.
Change the fill colour of the selected shape.
Adjust the style or thickness of the shape’s outline.
Change how rounded the corners of the shape appear.
Trim or resize the visible area of the shape.
Flip the shape horizontally or vertically.
Adjust how transparent or opaque the shape appears.
Add motion or animation effects to the shape.
Control how the shape is layered and aligned
with other elements in the design.
Quickly apply preset colour and design
styles to the selected shape.
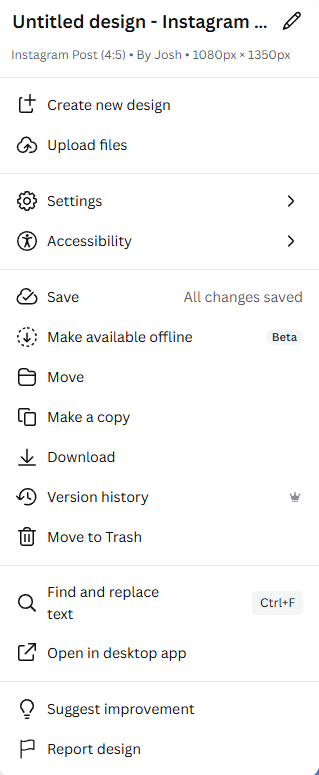
Rename your design and view details such as the design type,
creator, and dimensions.
Start a new Canva design without leaving your current project.
Upload images, videos, or other files to use in your design.
Access design settings and configuration options.
View accessibility tools and options to improve readability and usability.
Canva automatically saves your work, but this shows
the current save status.
Allow the design to be accessed and edited
without an internet connection (when supported).
Move the design to a different folder within your Canva projects.
Create a duplicate version of the design so you
can edit it without affecting the original.
Export your design in formats such as PNG, JPG, PDF, or MP4.
View and restore previous versions of your design.
Delete the design and move it to your Canva trash.
Quickly locate and replace words or phrases throughout your design.
Open the design in the Canva desktop application if it is installed.
Send feedback or suggestions to the Canva team.
Report a design if it violates Canva’s policies or guidelines.
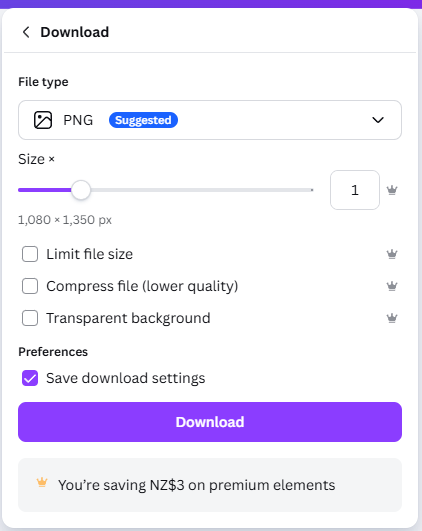
Choose the format you want to download your design in,
such as PNG, JPG, PDF, MP4, or GIF, depending on the type of project.
Adjust the resolution of your design. Increasing the size can
improve image quality for printing or large displays.
Reduce the file size of the download to make it easier to upload or share online.
Compress the file to reduce storage space,
though this may slightly reduce image quality.
Remove the background from the design so only the main elements remain.
This is useful for logos and graphics.
Remember your current download settings so they can be
reused the next time you export a design.
Export and save the design to your device using the selected settings.
Telling you how much the premium elements in your design would be worth.
Canva Premium Needed
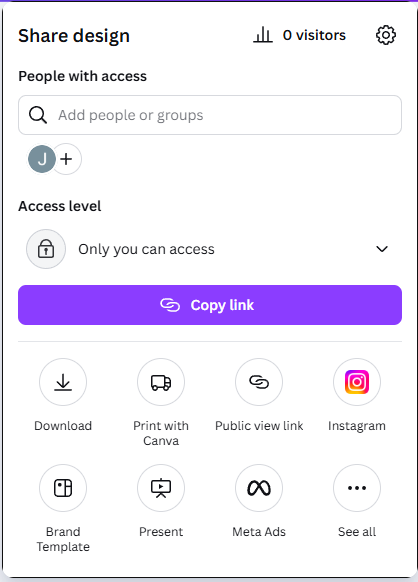
Invite people or groups to view, comment on, or edit your design.
Control who can access the design, such as only you,
specific people, or anyone with the link.
Generate a shareable link so others can view
or edit the design depending on the access settings.
Export your design as a file such as PNG, JPG, PDF, or video.
Order professional prints of your design directly through Canva.
Create a link that allows others to view the design in a presentation-style viewer.
Share or export your design directly to supported social media platforms.
Save the design as a reusable template for your team or brand kit.
Open the design in presentation mode for slides or live displays.
Export the design for use in Facebook or Instagram advertising.
View additional sharing, exporting, and publishing options available for the design.

Open Canva’s AI assistant to
generate text, images, design ideas,
or editing suggestions.
Quick access to AI-powered
editing tools for modifying images
or elements in your design.
Leave a comment about
this element.
Lock an element in place
so it cannot be accidentally
moved or edited.
Create a copy of the selected element.
Remove the selected element from your design.
Access additional actions and settings for the selected element.
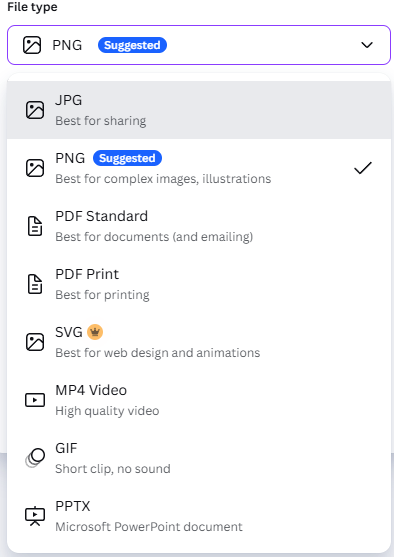
A compressed image format that creates smaller file sizes.
Best for sharing images online or when file size needs to be kept small.
A high-quality image format that preserves detail and supports transparent backgrounds.
Commonly used for graphics, logos, and social media posts.
Best for digital documents, email sharing, and online viewing.
Keeps text and layout clear.
Optimised for printing with higher quality and colour accuracy.
A scalable vector format often used for web graphics, icons,
and logos that need to stay sharp at any size.
Used for exporting animated designs or videos with high-quality playback.
A short looping animation format without sound,
often used for simple animated graphics online.
Exports the design as a Microsoft PowerPoint presentation file.